
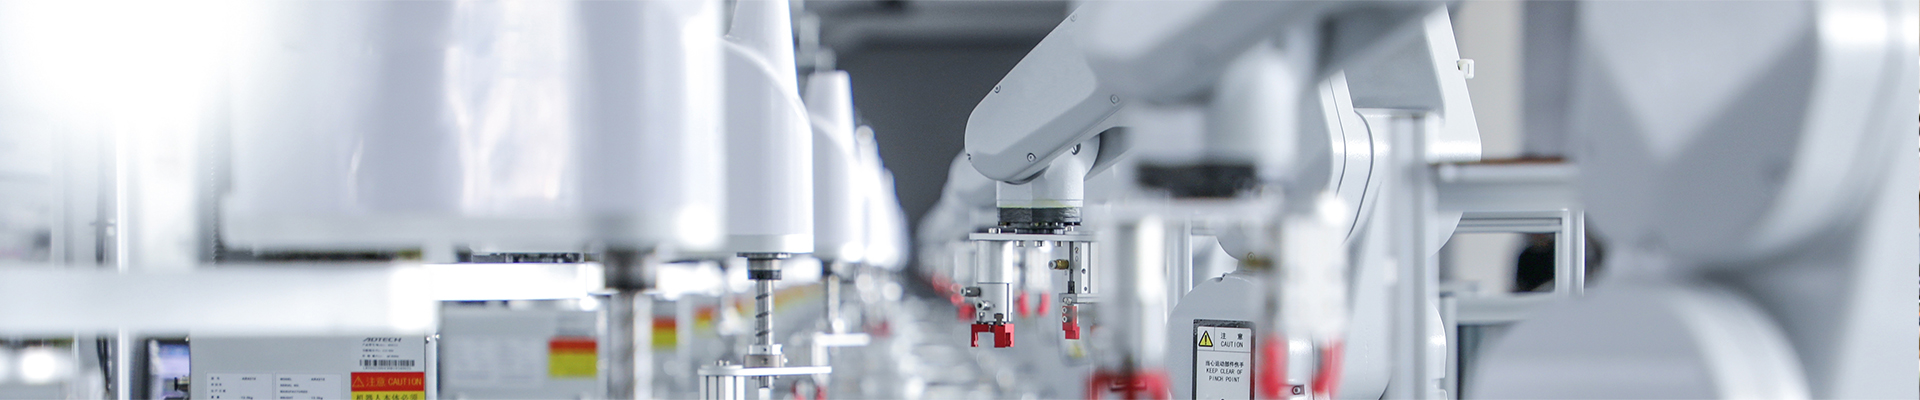
how to build a coil winding machine?
2025-11-01 14:58You want to build a coil winding machine that works well for your projects. Many beginners face a few common challenges:
Keeping wire tension steady during winding.
Making smooth transitions between layers in multi-layer coils.
Handling different wire sizes for various uses.
Preventing shorts by keeping windings insulated.
Managing the ends of wires for different designs.
Fitting custom bobbin shapes.
Balancing speed with accuracy.
This guide helps you solve these problems using simple tools and materials. You will learn hands-on skills and can adjust the machine to fit your needs.
Key Takeaways
Pick strong materials for the base and frame. This helps keep the machine steady when it works. Choose the right spindle and motor for your coil size. Think about how much control you want. Use wire tensioners to keep the wire tight. This makes the winding even. Add a good wire guide to stop tangles. It helps the wire layer smoothly. Put in safety features like guards and emergency stops. These protect you and the machine. Test and adjust your machine often. This helps you find problems early and keeps it working well. You can use automation like Arduino for better control. This makes coil winding more exact and faster. Look at upgrades like multi-spindle setups. These help you make more coils and save time.
1. Materials & Tools to Build a Coil

Materials List
Base Platform
You need a strong base to support your coil winding machine. Many builders use plywood, MDF, or even thick cardboard for small projects. Choose a material that stays flat and does not bend under pressure. If you want a more professional look, you can source pre-cut platforms from suppliers like Xiamen Sipu Mechanical.
Side Walls
Side walls hold the spindle and bearings in place. You can cut these from the same material as your base. Make sure they are tall enough to support the spindle and keep the coil stable during winding.
Spindle
The spindle acts as the main shaft that holds your coil or bobbin. Wooden dowels, metal rods, or even 3D-printed axles work well. Pick a spindle that fits the size of the coil you want to build.
Bearings
Bearings help the spindle spin smoothly. You can use skateboard bearings or small ball bearings from hardware stores. Secure them in the side walls for best results.
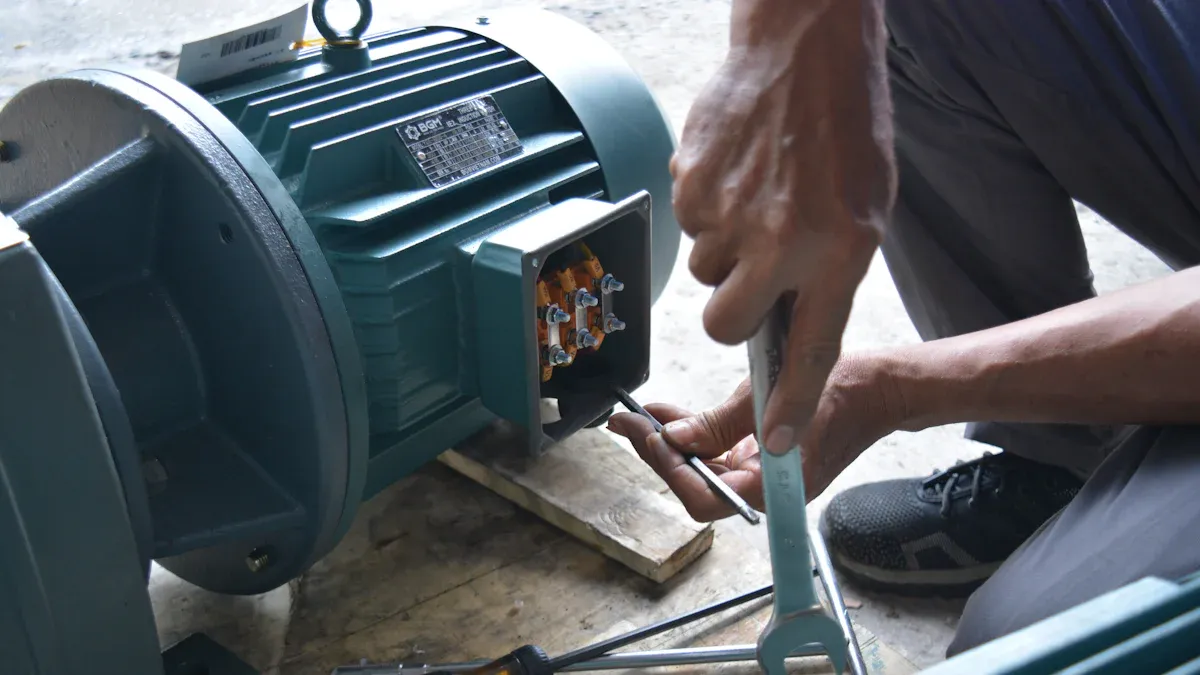
Motor
A motor powers the spindle. DC motors are simple and affordable. Stepper motors give you more control over speed and position. If you want to build a coil by hand, you can use a hand crank instead.
Wire Tensioner
Wire tensioners keep the wire tight as you wind. You can use rubber bands, felt pads, or spring-loaded clips. Some advanced machines, like the Automatic Coil Soldering Machine, use adjustable tensioners for better results.
Wire Guide
A wire guide helps you lay the wire evenly on the coil. You can make a simple guide from a bent piece of metal or use a 3D-printed part. For automated builds, consider a moving wire guide controlled by a motor.
Core Holder
The core holder keeps your bobbin or core in place. Use clamps, brackets, or custom holders that match your coil shape.
Winding Head
The winding head connects the spindle to the motor. You can use couplers, pulleys, or rubber bands to transfer motion.
Controller
A controller lets you start, stop, and adjust the winding process. Simple machines use toggle switches. For more control, use an Arduino Uno or Raspberry Pi Pico. Some kits include a display or keypad for easier operation.
Tip: You can find many of these parts in local hardware stores or online. Brands like Xiamen Sipu Mechanical offer ready-made solutions if you want to save time.
Tools Needed
Hand Tools
Screwdrivers
Pliers
Wrenches
Utility knife
Ruler or measuring tape
Power Tools
Electric drill
Soldering iron
Hot glue gun
Jigsaw or rotary tool (for cutting wood or plastic)
Wire Types
Enameled Copper
Enameled copper wire is the most common choice for winding coils. The enamel coating insulates the wire and prevents shorts.
Aluminum
Aluminum wire is lighter and cheaper than copper. It works for some projects but is harder to solder.
Magnet Wire
Magnet wire is a type of enameled wire used in motors, transformers, and speakers. It comes in many sizes and colors.
Thermocouple Wire
Thermocouple wire is for special coils that measure temperature. Use it only if your project needs this feature.
Note: Always choose the wire type and size that matches your project. The right wire helps you build a coil that works well and lasts longer.
2. Build a Coil Frame
Frame Design
Size & Material
When you build a coil winding machine, you need to start with the right frame size and material. The frame must fit your largest planned coil and leave enough space for the spindle, motor, and wire guide. Most builders use plywood, MDF, or thick cardboard for the frame. Each material has its own benefits:
Plywood: Strong and durable, ideal for long-term use.
MDF: Smooth and easy to cut, but heavier than plywood.
Cardboard: Lightweight and easy to shape, best for small or temporary builds.
A robust construction helps your machine withstand continuous operation and keeps your windings precise. This is especially important if you want to use your machine for high-volume projects or advanced builds like the Automatic Coil Soldering Machine.
Stability
Stability is key for smooth winding. A stable frame prevents vibrations and keeps the spindle aligned. You should always check that the base sits flat on your workbench. Reinforce the side walls if you notice any wobble. For extra support, you can add corner braces or use thicker material.
Assembly Steps
Cutting
Follow these steps to cut your frame parts accurately:
Cut the main base platform to your chosen size (for example, 9 x 8 inches).
Cut two side walls tall enough to hold your spindle and bearings.
For added support, cut four small pieces (about 2 x 1.5 inches) for the corners.
If you use cardboard, cut an H-shape for the side walls with a middle segment of about 1.5 inches.
Fastening
Secure the frame parts using these methods:
Mark and make holes for the bearings on the side walls.
Attach the bearings with hot glue or screws.
Use super glue to fix the small corner pieces to the base.
Position the side walls and fasten them with hot glue or wood screws.
For extra strength, create a frame for the second side wall using L-shaped cardboard and a wooden tongue depressor.
Tip: Precise measurements help your machine run smoothly. Double-check all cuts and marks before assembly.
Mounting Points
Spindle Support
You need to support the spindle on both side walls. Drill holes at the same height on each wall. Insert the bearings and make sure the spindle spins freely.
Motor Mount
Plan a spot for your motor close to the spindle. Use brackets or a custom mount to hold the motor steady. If you use a brand like Xiamen Sipu Mechanical, you may find ready-made motor mounts that fit perfectly.
Wire Guide Bracket
Install a bracket or holder for your wire guide. Place it so the wire lines up with the spindle. You can use a simple metal strip or a 3D-printed part.
Note: Careful placement of mounting points ensures even winding and reduces the risk of tangles. This step is crucial when you build a coil for precise applications.
3. Spindle & Motor
Spindle Setup
Choosing Spindle
Pick a spindle that matches your coil size and weight. For small coils, use a wooden dowel or metal rod. If you want something better, buy a precision spindle from Xiamen Sipu Mechanical. Make sure your spindle fits the bearings and core holder. The spindle should be straight and strong. This stops it from shaking when you use the machine.
Attaching Bearings
Bearings help the spindle spin easily. Put the bearings into the side walls. Make sure both bearings line up with each other. Slide the spindle through the bearings. Check if it moves without sticking. If it does not move well, fix the alignment before you tighten everything. Good bearing setup lowers friction and helps your machine last longer.
Tip: Always check if the spindle is straight before you tighten bolts. If it is not straight, the machine will shake and wind unevenly.
Motor Options
DC Motor
A DC motor is simple and cheap for powering your coil winding machine. You can change the speed with a voltage regulator. DC motors are good for hobby projects and small builds. They are easy to find and swap out.
Stepper Motor
If you want more control, use a stepper motor. Stepper motors help you make complex winding patterns. Many Automatic Coil Soldering Machines use stepper motors for better accuracy. You can connect a stepper motor to an Arduino or other controller. This lets you program how the coil winds.
Hand Crank
If you want to wind by hand, use a hand crank. This gives you full control over the winding. It works best for small coils or if you do not want to use electricity. Attach a handle to the spindle and turn it yourself. This way, you learn the basics before using motors.
Coupling
Direct Drive
Direct drive means the motor connects right to the spindle. This setup is efficient and saves energy. You do not need to fix many parts, so it is easy to care for. Direct drive is simple to line up and does not hurt the bearings much.
Belt Drive
A belt drive uses a belt and pulleys to link the motor and spindle. This setup absorbs shocks and lets you put the motor in different places. Belt drives help with alignment and let you change speeds. You need to check the belt often and replace it if it wears out.
Note: If you want a machine that is easy to care for, pick direct drive. If you want to move parts around, belt drive may work better for you.
Always look for these problems when you build your machine. Careful setup helps your coil winding machine work well and last longer.
Alignment
Getting your spindle and motor lined up right is important. This helps your machine run smoothly and makes good coils. If things are not lined up, the wire can wind unevenly or even break. You need to set up your machine carefully and check it often. Here are ways to keep your alignment and tension steady:
Tension Adjustment
Keeping the wire tight enough is very important. If the wire is too loose, it can get tangled or make bumpy layers. If it is too tight, the wire might snap or the coating could get damaged. You need a way to keep the tension the same while winding.
Key methods for adjusting spindle tension:
Manual Tensioners:
You can use felt pads, spring clips, or rubber bands to press on the wire. Change how much they press by hand until the wire feels just right. This is good for small projects or if you are learning.Adjustable Tensioning Devices:
Some people use tensioners with knobs or screws. You can turn these to change how hard they press on the wire. This lets you match the pressure to the wire size. It helps you make even layers, which is great for multi-layer coils.Automatic Tensioning Systems:
Some advanced machines, like the Automatic Coil Soldering Machine, have automatic tensioners. These use sensors or springs to keep the tension the same, even if the wire spool gets smaller. If you want to upgrade, look for tensioners from brands like Xiamen Sipu Mechanical.
Keeping the tension steady is needed for good coils. The right tension stops tangles and helps the coil layers stay even.
Steps to check and adjust tension:
Put the wire through your tensioning tool.
Pull the wire gently and see how it feels.
Change the tensioner until the wire moves easily but does not droop.
Turn the spindle slowly and watch if the tension changes.
Make small changes if you need to while winding.
Common tensioning problems and solutions:
Tip: Always test your tensioning setup before starting a new coil. This helps you avoid wasting time and wire.
When you pay attention to alignment and tension, your machine will work well every time you build a coil.
4. Wire Guide & Tension
Getting the wire spaced evenly is very important. You need a good wire guide and steady tension. This stops tangles and helps you make smooth coils.
Wire Guide Mechanism
Manual Guide
A manual wire guide lets you control where the wire goes. You can use a bent metal rod, a plastic tube, or a 3D-printed guide. Move the guide with your hand while the spindle spins. This way works well for small projects or learning coil winding.
You can change the wire’s spot for each layer.
Manual guides help you see problems like tangles or uneven wire.
Keep your hand steady and move at the same speed for best results.
Automated Guide
Automated wire guides use motors to move the guide side to side. Machines like the Automatic Coil Soldering Machine have this feature. Automated guides help you place the wire in the same spot every time. This is great for making many coils that look the same.
You can set the guide for your coil’s size and layers.
Automated systems lower mistakes and make winding faster.
These guides are best for making lots of coils.
Tip: Grooves in the base help keep the wire in place at first. When you add more layers, the wire often follows itself and makes winding easier.
Tensioning Device
Types of Tensioners
You can pick from different tensioning devices:
Braked pulleys control how hard the wire pulls.
Spring arms or felt pads press gently on the wire.
Magnetic brakes or motors give more control, good for rectangular coils.
Tensioners help you keep the wire moving at the right speed and tightness. If tension changes too much, the machine can shake and the coil can look messy, especially with rectangular bobbins.
Adjusting Tension
You need to keep tension the same while winding. Change the tensioner to fit your wire and coil shape. Round coils keep tension better. Rectangular coils may change tension as the wire moves. Check and adjust your tensioner often so the wire does not break or get too tight.
Even Winding
Layer Spacing
You get even layers by using the right wire guide and tension. Try to stretch the wire between 3% and 6%, based on its thickness. This helps the wire lay flat and straight. Grooves and careful machine setup also help you space layers well.
Preventing Tangles
Use these tips to stop tangles and keep winding smooth:
Clean the spool before you start.
Keep wire tension correct all the time.
Make sure pulleys and guides work well.
Pick the best winding style for your wire.
Set a good speed—do not go too fast.
Stop winding at the right number of turns.
Handle wires gently so they do not get scratched.
Check and set up your machine often.
Look at your work as you go to check quality.
Use good wire for the best coils.
Note: Steady tension and a good wire guide help you make great coils. Machines from Xiamen Sipu Mechanical and features in the Automatic Coil Soldering Machine can help you get pro results every time.
5. Controls, Testing & Safety
Control System
Manual Switches
Manual switches let you control your coil winding machine by hand. You can turn the machine on or off with a toggle or push-button switch. You can also change which way the spindle spins. This setup is good for small projects or if you want to wind coils yourself. Manual systems do not cost much and are easy to use. If a switch breaks, you can fix or swap it quickly.
Programmable Controller
A programmable controller helps you wind coils automatically. You can set how many turns you want and pick the speed and direction. This is best for making lots of coils or when you need every coil to be the same. You might need to learn how to use the controller first. These controllers help you make fewer mistakes. Many machines, like the Automatic Coil Soldering Machine, use these controllers for better results.
Arduino/GRBL
Arduino and GRBL systems are a cheap way to make your coil winding machine automatic. You can use old 3D printer parts and 3D-printed pieces to save money. The wire is usually the most expensive part. Arduino systems need some tech skills, but you can learn a lot from them. You can write your own programs for different coil shapes and sizes. Xiamen Sipu Mechanical sells parts that work with Arduino.
Tip: If you want to move from manual to automatic, try Arduino first. It does not cost much and helps you learn about coding and electronics.
Testing
Power-On
Before using your machine, check all the wires and plugs. Turn on the power switch. Listen and smell for anything strange. If you hear odd noises or smell burning, turn off the machine and look for problems.
Spindle Check
Watch the spindle as it turns. It should spin smoothly and not shake. If it wobbles or makes grinding sounds, check the bearings and make sure everything lines up. A smooth spindle helps you wind coils neatly and keeps the wire safe.
Wire Feed Test
Put the wire through the guide and tensioner. Turn the spindle slowly and watch the wire as it wraps around the coil. The wire should move smoothly and lay flat. If you see knots or bumps, fix the tension or move the guide.
Note: Test your machine often to find problems early. This keeps your machine safe and your coils looking good.
Calibration
Speed Adjustment
Pick the right speed for your coil. Use the controller or a dial to change how fast the spindle turns. Start slow until you feel ready to go faster. Fast speeds are good for simple coils. Slow speeds help you control tricky shapes.
Tension Fine-Tuning
Check the wire tension before you start winding. Use the tensioner to make small changes. The wire should be tight but not pulled too hard. Pull the wire gently to see if it feeds onto the coil the right way.
Check and adjust your machine often.
Use good tools and follow the steps.
Change tension and guides if you need to.
Test your machine before every use.
Calibrating your machine helps you get good results every time you wind a coil.
Troubleshooting
When you make or use a coil winding machine, you might have problems. Knowing how to find and fix these problems keeps your machine working well.
Motor Issues
Motor problems can stop your work. Sometimes the spindle will not spin. The speed may also change suddenly. These problems often happen because of loose wires or worn brushes. Overheating can also cause trouble. Check all wires and make sure the motor has enough power. Clean and tighten parts often to stop breakdowns. Some builders use real-time checks or optical tools to find problems early. This is common in advanced machines like the Automatic Coil Soldering Machine.
Uneven Winding
Uneven winding makes coils look messy and work poorly. This happens if the wire guide moves too fast or too slow. It can also happen if the tension changes while winding. You can fix this by using careful winding and special tools. Machines from Xiamen Sipu Mechanical have features to help keep layers even. Always check your wire guide and tensioner before starting.
Wire Breakage
Wire breakage happens a lot, especially with thin or weak wire. It can happen if you pull the wire too tight or wind too fast. Damaged wire can also break easily. To stop this, use good wire and handle it gently. Automatic wire feeders with tension control help lower breakage. These are found in the Automatic Coil Soldering Machine. Check your tension settings often and slow down if the wire stretches.
Here is a quick table to help you fix problems:
Tip: Check and adjust your machine often to keep it working well.
Safety Features
You should always think about safety when making or using a coil winding machine. Good safety features keep you and your machine safe.
Guards
Put guards around moving parts like the spindle and motor. Guards keep your hands and clothes away from danger. Many machines, like those from Xiamen Sipu Mechanical, have built-in guards for extra safety.
Emergency Stop
Every coil winding machine needs an emergency stop button. Put it where you can reach it fast. When you press it, the machine stops right away. This helps stop accidents if something goes wrong.
Emergency stops must be easy to see and use.
The button should stop the machine right away.
Fast stopping can keep you safe and protect your machine.
Electrical Safety
Follow safety rules for electricity. Use wires with good insulation and make sure all connections are tight. Ground your machine to stop shocks. Add fuses or breakers to prevent fires from electrical problems. Always use the right size wire and do not bend or crush wires. Safety interlocks and emergency stops give extra protection.
Note: Good safety steps help you avoid accidents and keep your coil winding machine working for a long time.
You can make a coil winding machine in five easy steps. First, collect all the materials and tools you need. Next, build a strong frame for your machine. Then, put in the spindle and motor. After that, set up the wire guide and tension parts. Last, add controls, test your machine, and check for safety.
Some people, like Bryan from Epicenter.com, change their machines to work better. Adding things like multi-spindle and multi-tasking features helps you do more at once. These upgrades save time and help you make more coils.
Try new things and upgrade your machine when you can. Always remember to follow safety rules. You can share your project or ask for help below!
FAQ
How long does it take to build a coil winding machine?
You can make a simple coil winding machine in one day. If you want more features or automation, it might take two or three days. Kits from Xiamen Sipu Mechanical help you finish faster.
Can I use an Automatic Coil Soldering Machine for winding coils?
Yes, you can use an Automatic Coil Soldering Machine to wind coils. These machines give you good control and steady results. They work for hobby projects and professional jobs.
What wire types work best for coil winding?
Enameled copper wire is best for most coil winding projects. Magnet wire is also a good choice. For special uses, you can try aluminum or thermocouple wire. Always pick the wire that fits your project.
Do I need special tools to assemble the machine?
You only need basic hand tools like screwdrivers and pliers. Power tools such as a drill or soldering iron make building easier. Kits from Xiamen Sipu Mechanical often have all the tools you need.
How do I keep wire tension steady during winding?
Use a wire tensioner or an adjustable device to keep tension steady. Manual tensioners are fine for small projects. Automatic Coil Soldering Machines have built-in tension control for better results.
Can I automate my coil winding machine?
Yes, you can automate your coil winding machine with Arduino or GRBL controllers. Automated machines help you make coils faster and with fewer mistakes. Many builders use parts from Xiamen Sipu Mechanical to upgrade.
What safety features should I add?
Add guards around moving parts and an emergency stop button for safety. Use good electrical insulation and grounding. Machines from Xiamen Sipu Mechanical have built-in safety features for extra protection.
Where can I find replacement parts?
You can buy replacement parts at hardware stores or online shops. Xiamen Sipu Mechanical sells parts and upgrade kits for many coil winding machines.